The content of application form varies with courses. Refer to
the instructions in the corresponding sections below to complete the application
form.
Applicant details
To complete the Applicant details section, refer to
the following steps:
1. In Applicant
details, you can view your personal information retrieved from My
profile.

Note the following:
• If you
are a foreigner not using IVS, the supporting document must be uploaded for
verification.
• If you
want to update the personal information, go to My profile >
Personal particular to manually edit the information.
• If you
are an NUS alumni, ensure that you have completed the alumni verification in
Personal particular. This
can affect the available discounts you may use.
• You
can click Retrieve Myinfo or Retrieve from NUS records to sync
your personal information. However, once your information is synced from Myinfo,
the information apart from family name and given name will not be able to be
edited directly in L3AP. What is more, information will not be able
to be retrieved from NUS records.
• If you
are applying via the application link provided by your company, you can check
the company sponsorship information in Application details.

2. If you are a NUS
staff and applying with your WS1A learner account, the Internal charging
section will be available.

Indicate whether you are sponsored by NUS and provide the
corresponding information. The available approvers are synced from CHRS once you
have selected the department. If multiple approvers are synced, select an
approver from the drop-down list.
*Note: Your WBS information needs to be obtained
from your Reporting Manager.
3. If the course is
in an online Mode of Training and you are a non-Singaporean applicant, select
the Physical location during the course.
4. In the Where
do you hear from us? section, select the media.

5. Click Save and
next. A warning message, “Please be aware that, to qualify for SSG Funding,
it is essential that your information is retrieved from Myinfo. Not doing this
could negatively affect your funding eligibility.” will be displayed. Click
OK to proceed.

Education qualification (if applicable)
To complete the Education qualification section, refer
to the following steps:
1. In Education
qualification, click Add education qualification and fill in the
information of the education qualification, and click Save when you
finish.

Alternatively, you can click Sync education
qualification from profile, select the education qualifications to sync from
your profile, and click Save.

Note the following:
• If the
academic qualification/professional certification you selected requires a
subject/specialisation, click Add subject/specialisation and fill in the
information on the subject/specialisation.
• If you
have completed the academic qualification/professional certification with no
pass, select the Completed with no pass checkbox.
• If you
cannot find an appropriate academic qualification/professional certification in
the list, enter the name of an academic qualification/professional certification
in the Additional information field.
2. In the
Supporting documents field, click Select system files, select
files, and then click Add to add them as supporting documents. You can
also upload files from your local device by dragging files to the upload box or
clicking browse to browse and select the files.

3. Click Save and
next.
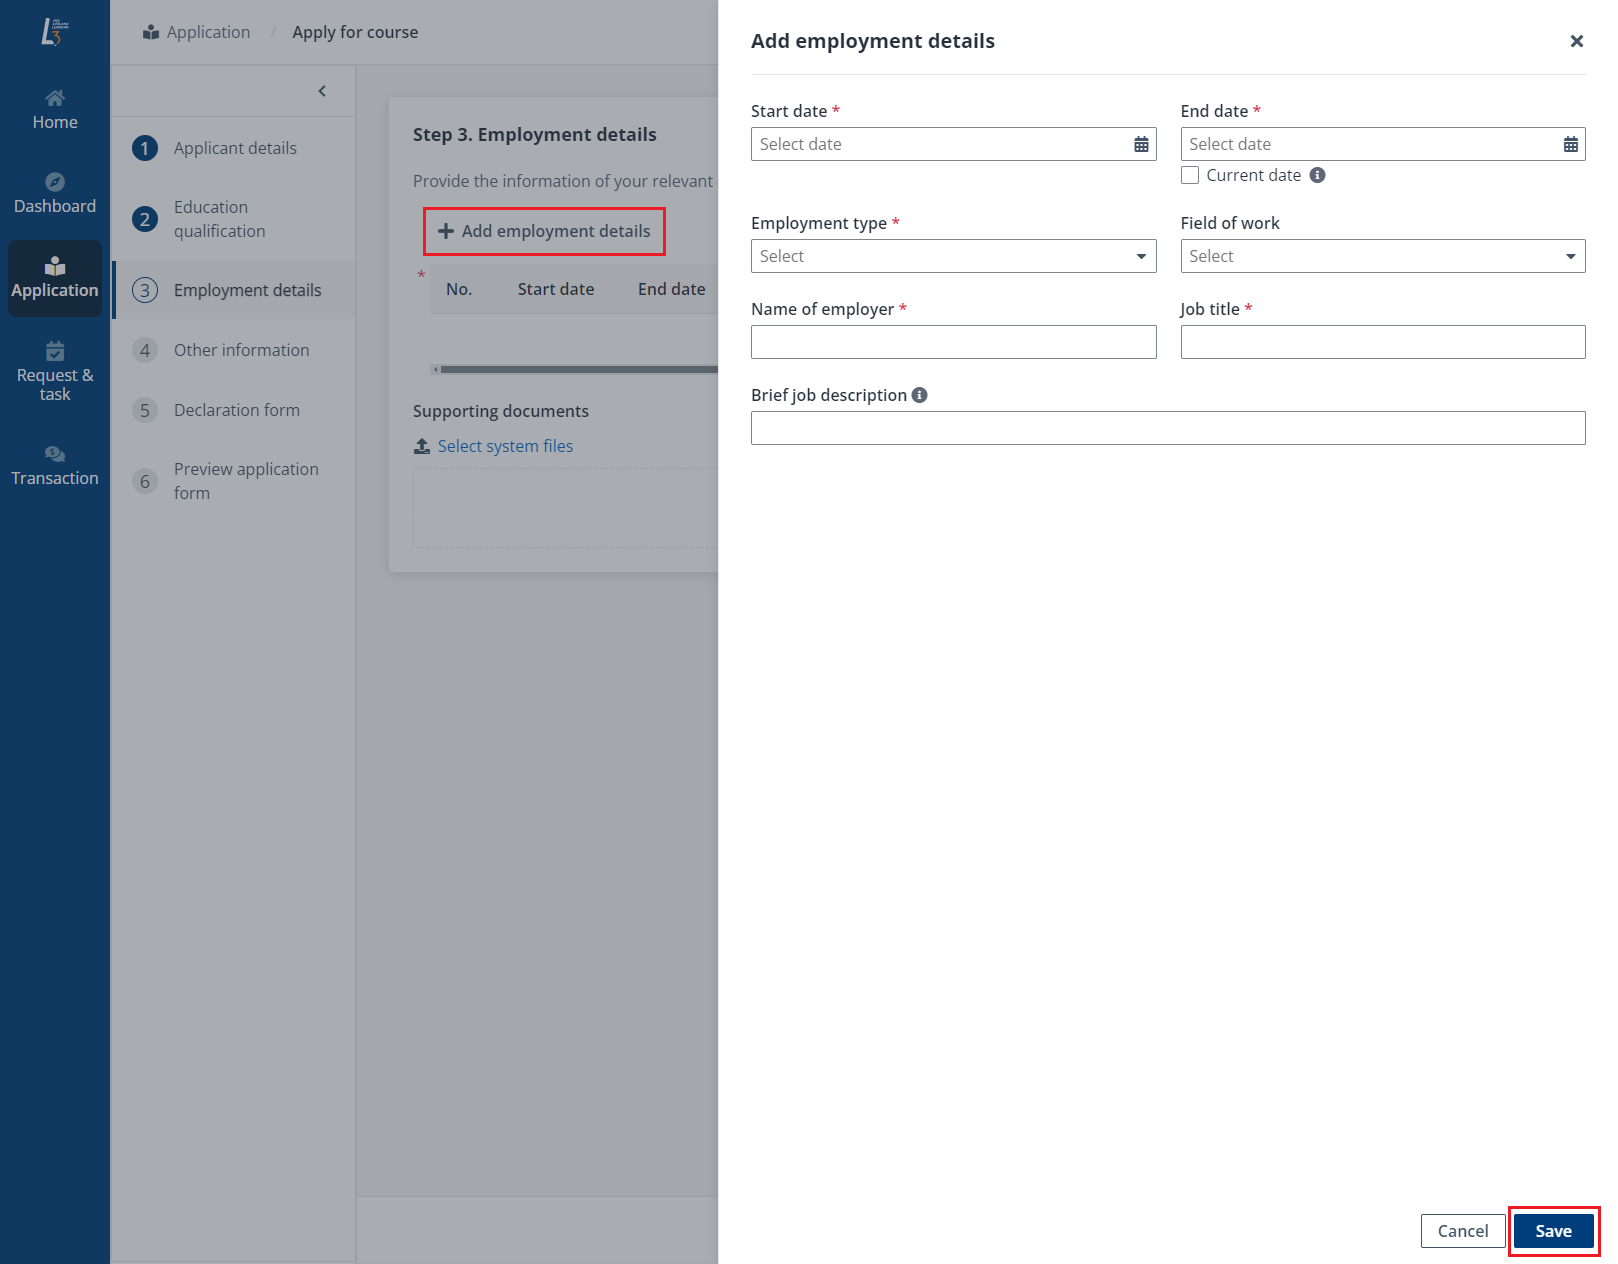
Employment details (if applicable)
To complete the Employment details section, refer to
the following steps:
1. In Employment
details, click Add employment details, fill in the information, and
then click Save.

Alternatively, you can click Sync employment details
from profile, select the employment details to sync from your profile, and
click Save.

2. (Optional) In the
Supporting documents field, click Select system files, select
files, and then click Add to add them as supporting documents. You can
also upload files from your local device by dragging files to the upload box or
clicking browse to browse and select the files.

3. Click Save and
next.
Other information (if applicable)
To complete the Other information section, refer to
the following steps:
1. In Other
information, complete the required information for the application form.

2. Click Save and
next.
Parental consent and indemnity form (if
applicable)
If you are under 18 and are applying for a Youth Camp course,
you may need to provide the parental consent and indemnity form based on the
course requirements.
To provide the form for course application, complete the
following steps:
1. Click Download
form first to download a template form.
2. Complete the
form.
3. Drag the file to
the upload section or click browse to upload the file.
4. Click Save and
next.
Indemnity form (if applicable)
If you are over 18 and are applying for a Youth Camp course,
you may need to provide the indemnity form based on the course requirements.
To provide the form for course application, complete the
following steps:
1. Click Download
form first to download a template form.
2. Complete the
form.
3. Drag the file to
the upload section or click browse to upload the file.
4. Click Save and
next.
Pre-submission minimum entry requirement check (if
applicable)
To complete the Pre-submission minimum entry requirement
check section, refer to the following steps:
1. In
Pre-submission minimum entry requirement check, you can see the MER check
results for the course in the Minimum entry requirement check results
section. Refer to the explanation below for each check result:
• Green
tick – This result meets the minimum entry requirement.
• Not
checked – This result does not meet the minimum entry requirement.
•
Submission check – The current application form meets the minimum entry
requirement.
2. In the Minimum
entry requirement declaration section, you can see whether you meet the
minimum entry requirements.
• If you
meet the minimum entry requirements, select the I confirm that I have met the
minimum entry requirements and wish to proceed checkbox.
• If you
don’t meet the minimum entry requirements, select the I don't meet the
minimum entry requirements and would like to proceed with recognized prior
learning application checkbox and fill in the information for the RPL
registration form.
3. Click Save and
next.
For courses without minimum entry requirement checks, you
need to choose whether to proceed with recognized prior learning application and
fill in the registration form in the Additional information
step.
Declaration form
To complete the Declaration form section, refer to the
following steps:
1. In Declaration
form, you can see all declaration forms.

2. Click the
declaration form name, select the I hereby acknowledge and accept the
responsibilities under this declaration checkbox after reading the
declaration, and click Save.

3. Repeat the above
step for each declaration form if there are multiple declaration forms.
4. Click Save and
next.
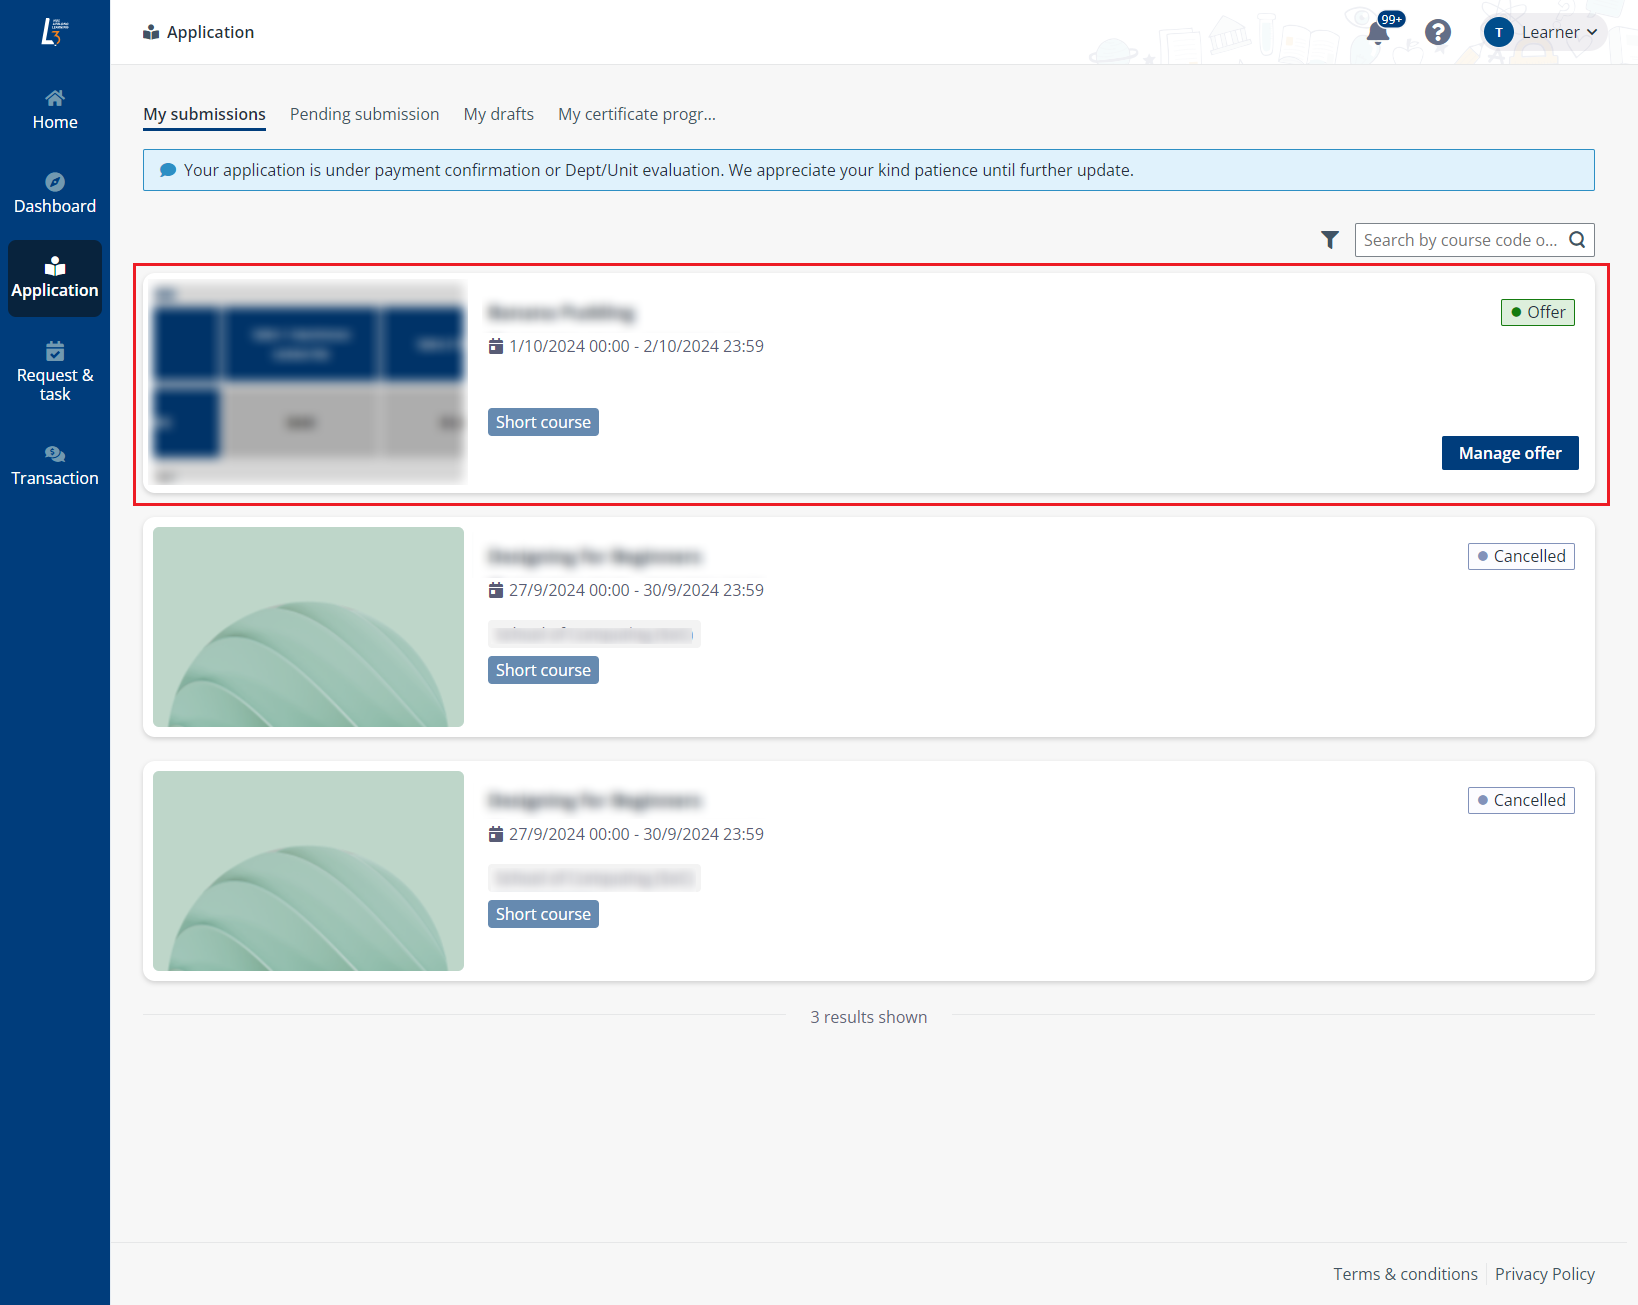
Preview application form and pay
For available actions in the Preview application form
section, refer to the following steps:
1. In Preview
application form, you can see all application information configured in
previous steps.

2. After checking
the application information, you can choose one of the following application
processes:
• If you
are applying for a PUO course, click Submit to submit the application
form.
Upon submission, the alert message, “You have completed the
application form. Once submitted, information of all steps cannot be edited
anymore.”, appears, click Confirm.

• If you
are applying for a PUA course, you can click Confirm and pay. In the
Confirm and pay window, select Pay now and you will be proceeded
to Module selection.
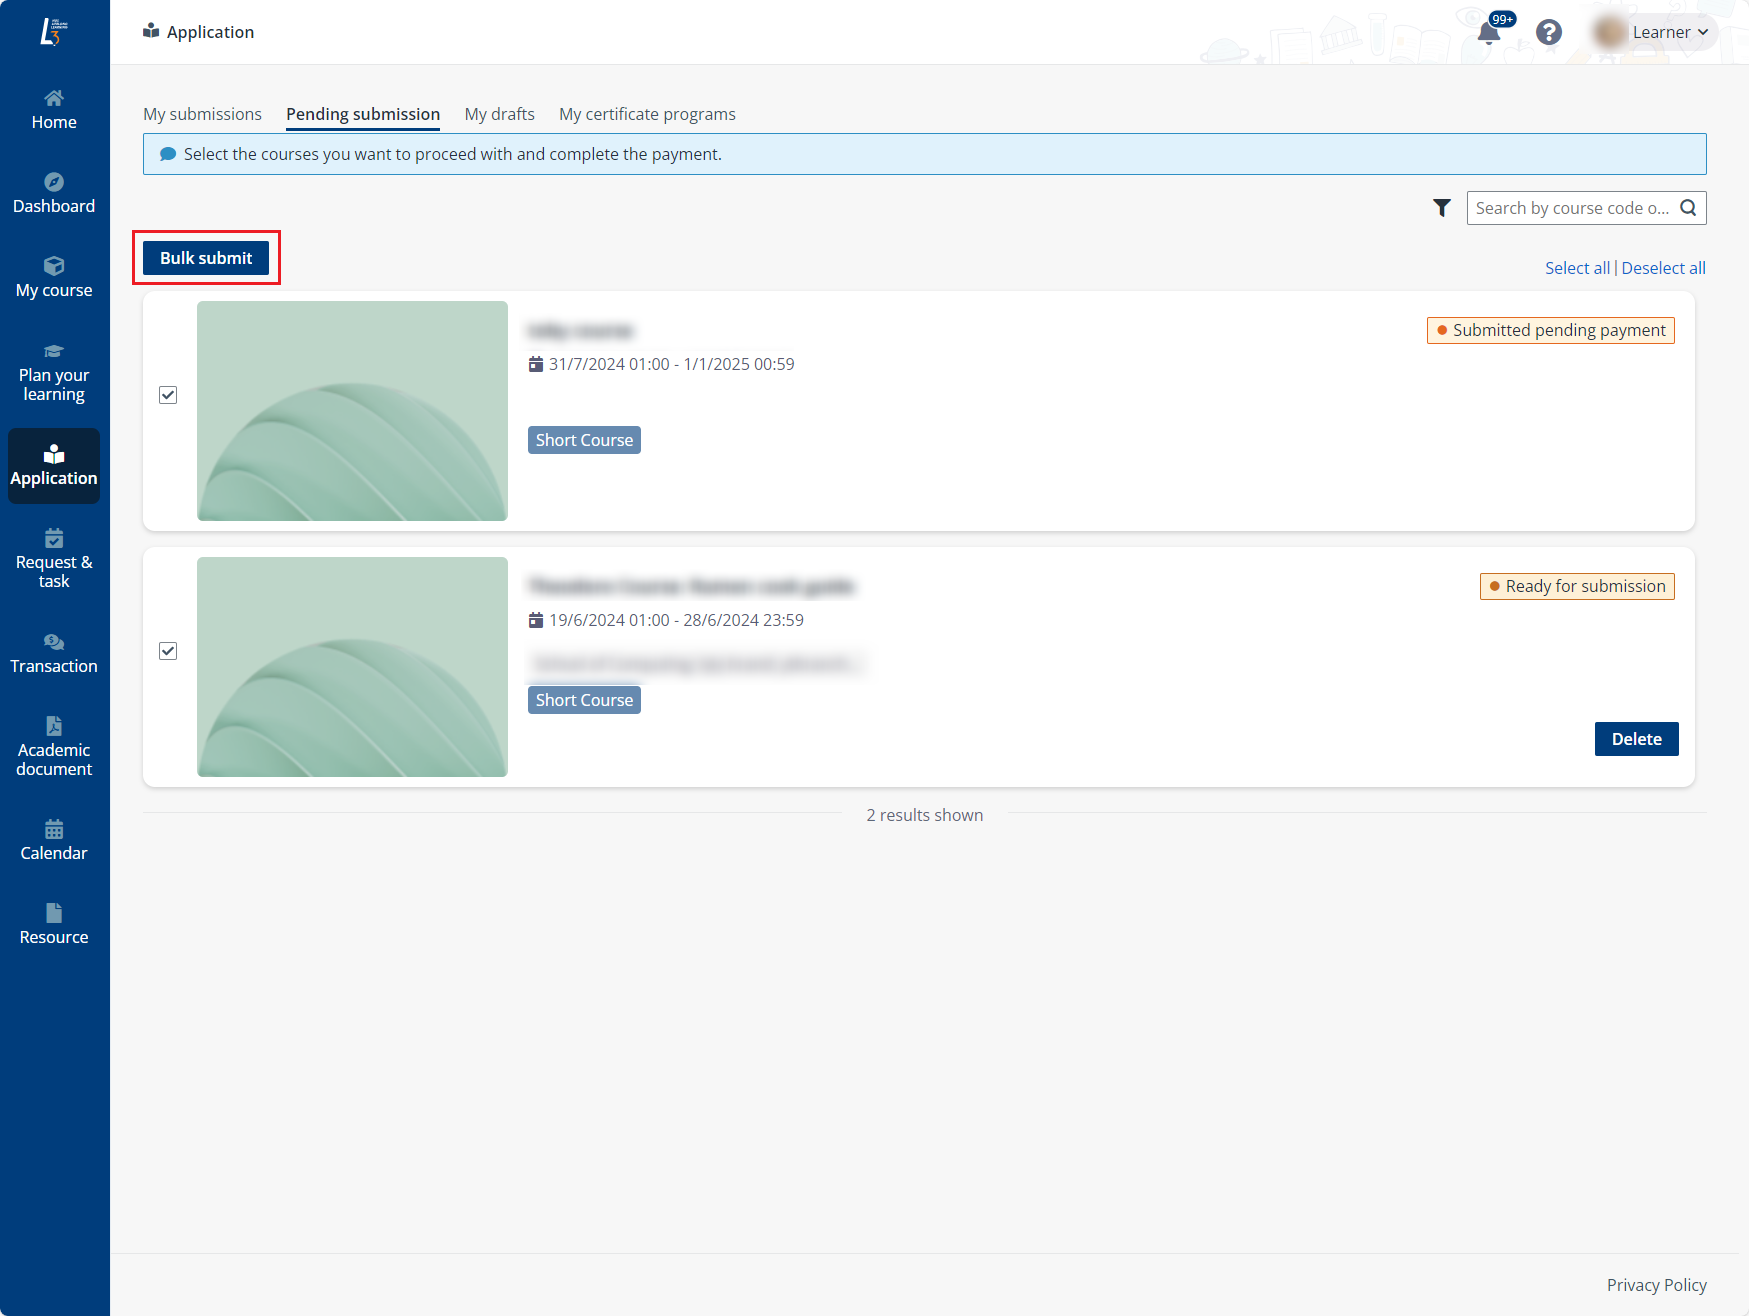
You can also select Pay later with other pending
applications in Application > Pending submission in the Confirm and
pay window to complete the payment and submit the application later.
Note the following:
• The
system provides two application processes based on the payment options:
o PUA (Pay-upon-application) –
You need to make payment during the application process to complete the
application.
o PUO (Pay-upon-offer) – You
need to wait for a course offer to be made available for your acceptance and
payment after the application process.
•
SkillsFuture Credit (SFC) payment is only available for TPG courses that
has started for more than 60 days. Additionally, to pay with SFC, make sure you
have configured your full NRIC number in your profile.
3. If you have
selected SFC as the payment mode, click Proceed to apply for SkillsFuture
Credit (SFC). The Singpass login page will appear.
4. Log in by
scanning the QR code with your Singpass app. Or you can click the
Password login tab to enter your account number and password to
log in.
5. Upon logging in,
you will be redirected to the SFC payment page, where you need to confirm your
profile and course information.
6. To continue
payment, click Yes in the Declaration section, then enter the
amount of credit to claim and select the I have read and agreed to the
SkillsFuture Credit Terms & Conditions checkbox before clicking
Submit.

7. Upon submission,
you will be navigated back to the learner portal with a message indicating your
successful submission.
The claim status can then be checked in your MySkillsFuture
portal.